MS Entra Identity (구 Azure Active Directory)
어느날 문득
사내에
MS Office 365를 사용중이다
MS Entra (구 Azure Active Directory) 를 둘러보다MS Office 365계정으로 인증을 받을 수 있을 것 같았다.
안그래도 재작년 즈음에 고객사중Azure를 사용하던 곳이 있어서 로그인 인증을 구현해준 적 있었는데 동일하지 않을까? 하는 호기심으로 일단 MSDN을 살펴보았다.
MSDN을 살펴보자
제일 먼저 구글에 MS Entra Identity를 검색했고
IAM에 대해서 살펴보았다.
내가 찾던게 맞을것 같은 느낌이 들었다.
오케이 진행해!!
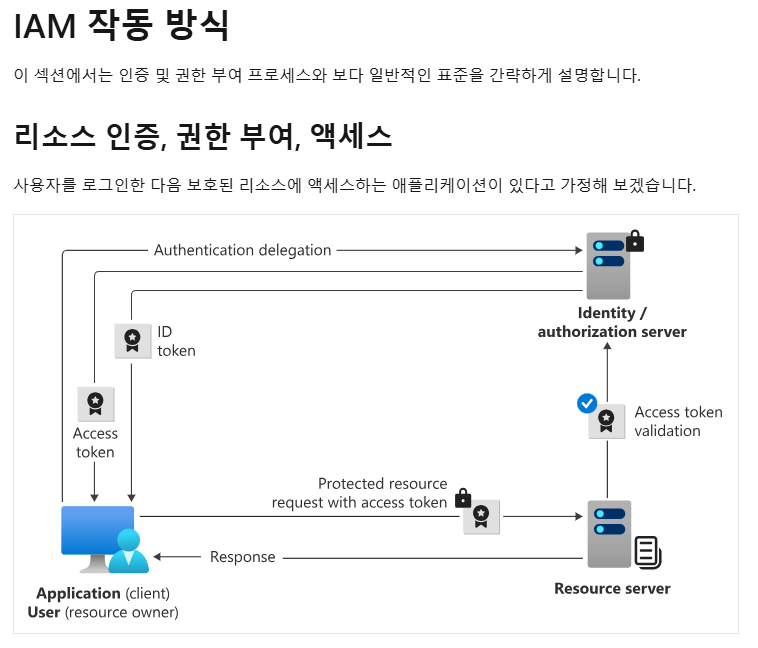
Microsoft ID 플랫폼 앱 형식 및 인증 흐름
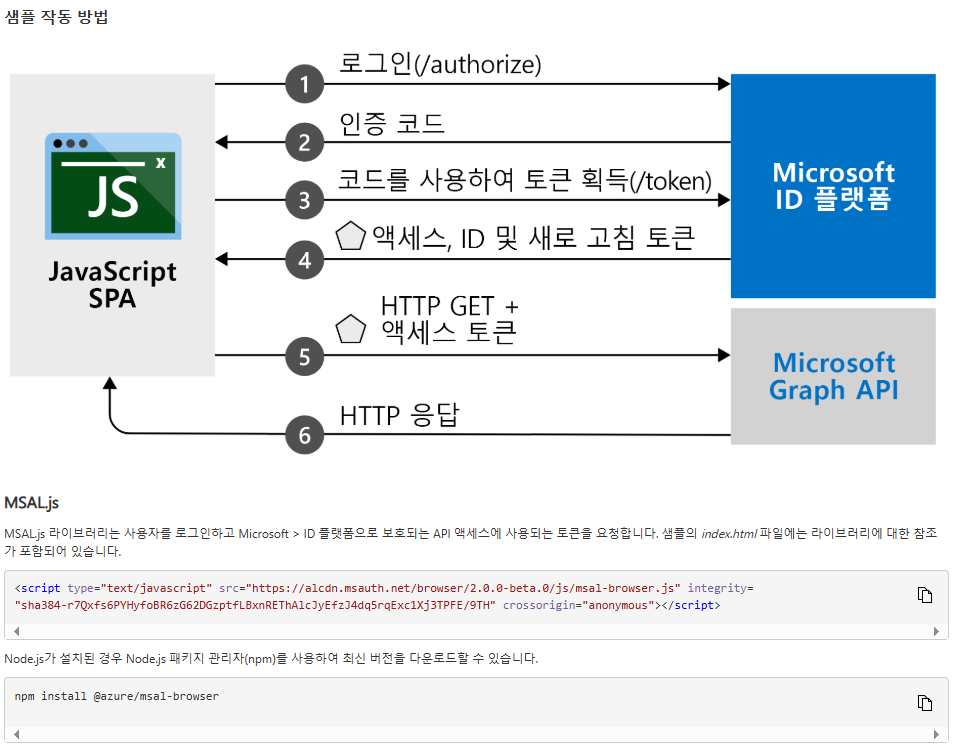
Microsoft ID 플랫폼용 인증 라이브러리(MSAL)를 사용해 어플리케이션에서 ID인증을 통해 토큰을 획득 할 수 있다.
사용가능한 어플리케이션은 아래와 같다.
- 웹앱
- 모바일 앱
- 데스크톱 앱
- Web API
진행 절차
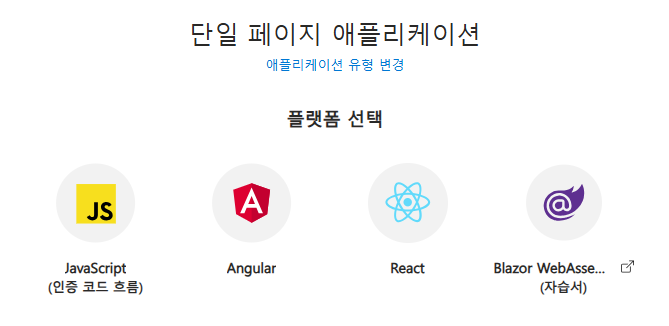
SPA(단일 페이지 애플리케이션) 설명서에 나와있는 순서대로 진행해 보겠다.
하지만 이걸 알아내는데 꽤 오랜시간이 걸렸다.
어째 MSDN은 점점 더 문서가 문어발처럼 엮여서 찾아보기 힘들어 지는듯 하다.
크게 진행절차는 두개이다.
- 어플리케이션 등록
- 로그인 페이지 수정
1. 어플리케이션 등록
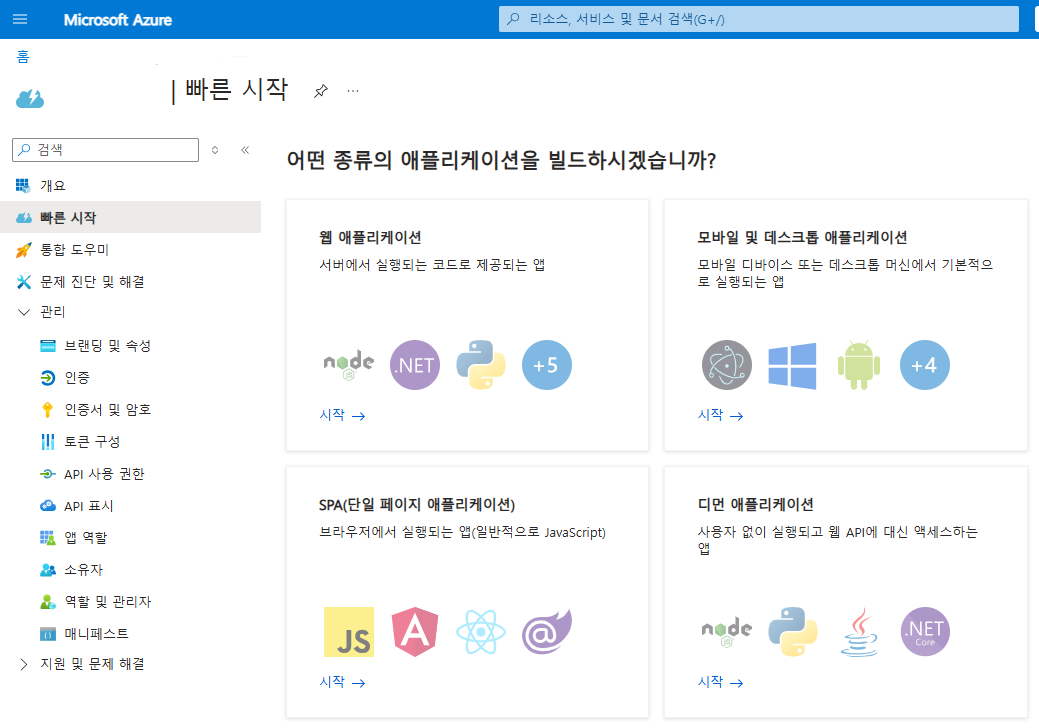
1-1. (예전)Azure Portal로 빠른시작
Azure Portal에서 빠른시작을 사용하면 꽤나 편하게 등록할 수 있다.
MS Entra에 비해 예제코드도 그렇고 훨씬 편리해보인다.
하지만 사용방법이 예전 API에 대한 내용이다.
최신 API 사용방법은 위에 기술했던 MSDN을 참고해야 한다.
그러므로 앞으로 나올 내용은 MS Entra 기준으로 설명을 계속 하겠다.
1-2. (최신)MS Entra로 등록
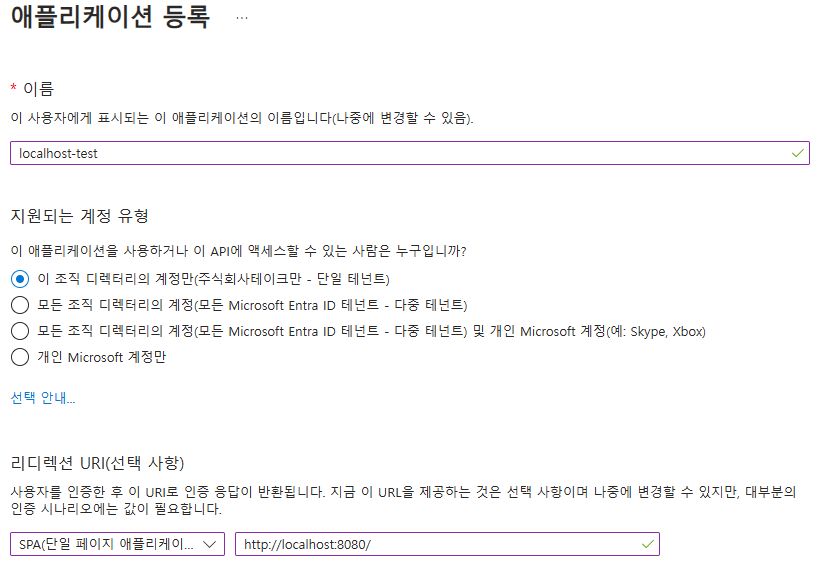
MS Entra에서 ID > 애플리케이션 > 앱 등록으로 이동하여 등록 할 수 있다.
리디렉션 API 유형은 SPA를 선택한다.
2. 로그인 페이지 수정
로그인 페이지 수정은 아래 코드를 참고해서 진행한다
git clone https://github.com/Azure-Samples/ms-identity-docs-code-javascript.git
2-1. javascript 추가
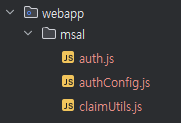
Git Repository에서 가져와야 할 javascript는 authConfig.js, auth.js, claimUtils.js 이다.
프로젝트의 적당한 곳에 옮겨주자.
2-2. authConfig.js 수정
MS Entra에서 앱을 등록 후 개요 화면의 클라이언트ID, 태넌트ID와 아까 등록한 리디릭션URI를 authConfig.js에 입력해주었다.

| MS Entra 항목 | authConfig 항목 |
|---|---|
| 애플리케이션(클라이언트) ID | clientId |
| 디렉터리(태넌트) ID | authority |
| 리디릭션URI | redirectUri |
const msalConfig = {
  auth: {
    clientId: "클라이언트아이디",
    authority: "https://login.microsoftonline.com/태넌트아이디",
    redirectUri: "리디릭션URI",
    //...중략
  },
};
2-3. auth.js 수정
signIn 함수의 loginPopup 호출부를 보면 method에 따라 popup과 redirect를 분기하는데
나는 redirect만 사용하므로 불필요 부분은 모두 제거했다.
async function signIn(method) {
  return myMSALObj.loginRedirect(loginRequest);
}
만약 popup을 사용한다면 redirectUri를 아래처럼 주석처리 해야 authConfig.js의 redirectUri가 적용된다.
async function signIn(method) {
  return myMSALObj
    .loginPopup({
      ...loginRequest,
      //redirectUri: "/redirect"
    })
    .then(handleResponse)
    .catch(function (error) {
      console.log(error);
    });
}
popup이던 redirect던 어쨌든 인증이 성공했을 경우 handleResponse 함수에서 후속작업을 처리하면 된다.
나는 우선 로깅을 위해 showWelcomeMessage를 구현해주었다.
function handleResponse(resp) {
  if (resp !== null) {
    accountId = resp.account.homeAccountId;
    myMSALObj.setActiveAccount(resp.account);

    //후속작업이 필요한 경우 아래에 추가
    showWelcomeMessage(resp.account);
  } else {
    selectAccount();
  }
}

function showWelcomeMessage(result) {
  console.log("result", result);
}
그리고 selectAccount 함수에서 updateTable은 지워도 된다.
단지 예제에서 사용하는 함수일 뿐이다.
function selectAccount() {
  const currentAccounts = myMSALObj.getAllAccounts();

  if (!currentAccounts) {
    return;
  } else if (currentAccounts.length > 1) {
    // Add your account choosing logic here
    console.warn("Multiple accounts detected.");
  } else if (currentAccounts.length === 1) {
    username = currentAccounts[0].username;
    showWelcomeMessage(currentAccounts[0].username);
    // updateTable(currentAccounts[0]); 지워도 되는 함수
  }
}
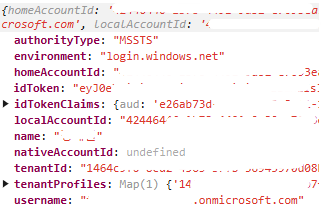
로그인을 수행하면 showWelcomMessage 함수에서 이렇게 사용자정보가 출력된다.
2-4. 로그인 페이지 수정
로그인용 html에 authConfig.js, auth.js를 삽입했다.
가장 중요한!!! msal-browser.js 는 (node를 사용하고 있지 않아)cdn을 검색해서 추가해주었다.
최신 버전은 2025-03-17 기준 4.7.0으로 파악된다.
<script src="https://cdn.jsdelivr.net/npm/@azure/msal-browser@4.7.0/lib/msal-browser.min.js"></script>
<script type="text/javascript" src="./authConfig.js"></script>
<script type="text/javascript" src="./auth.js"></script>
2-5. 로그인 성공 시
로그인을 성공하면 페이지가 redirect될 것이며 페이지가 로딩된 후에 sessionStorage에 저장된 계정정보로 추가 인증을 진행하면 된다.
나는 여기서 가져온 token으로 백엔드에서 한번 더 인증정보를 획득 후 사용하려 한다.
-
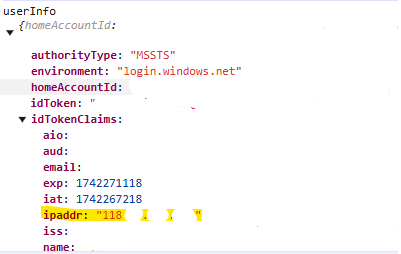
myMSALObj.getActiveAccount: 로그인된 사용자정보 획득 #사용자정보 항목 추가 -
myMSALObj.acquireTokenSilent: accessToken 획득 -
getTokenRedirect:Microsoft Graph를 활용해 여러 API를 호출 할 수 있음 여기서는 프로필 정보를 조회
관련문서
// sessionStorage에서 가져옴
const userInfo = myMSALObj.getActiveAccount();
console.log("userInfo.username", userInfo.username);

// accessToken 가져옴
myMSALObj
  .acquireTokenSilent(loginRequest)
  .then((res) => console.log("accessToken", res.accessToken))
  .catch((error) => console.error(error));

// profile 가져옴
if (!userInfo) return;

getTokenRedirect(
  loginRequest,
  userInfo,
  (endpoint = "https://graph.microsoft.com/v1.0/me")
)
  .then((res) => {
    const accessToken = res.accessToken;
    const headers = new Headers();
    const bearer = `Bearer ${accessToken}`;

    headers.append("Authorization", bearer);

    const options = {
      method: "GET",
      headers: headers,
    };

    console.log("request made to Graph API at: " + new Date().toString());
    return fetch(endpoint, options);
  })
  .then((response) => response.json())
  .then((response) => {
    console.log("profile", response);
  })
  .catch((error) => console.log(error));
3. 로그아웃 페이지 수정
로그아웃도 request를 만들어 호출한다.
const logoutRequest = {
  account: myMSALObj.getActiveAccount(),
};

myMSALObj.logoutRedirect(logoutRequest);
백엔드
나는 Spring Boot가 아니라서 Servlet 예제를 활용했다.
1. dependency 추가
이미 인증을 거친 뒤라 microsoft-graph 만으로도 사용자정보를 확인 할 수 있다.
<!-- msal -->
<dependency>
    <groupId>com.microsoft.graph</groupId>
    <artifactId>microsoft-graph</artifactId>
    <version>5.80.0</version>
</dependency>
2. Controller
기본적인 예제이므로 흐름만 참고해주세요.
  @ResponseBody
  @RequestMapping(value = "ssoLogin.do")
  public ApiDTO<Map<String, Object>> ssoLogin(HttpServletRequest request, @RequestHeader HttpHeaders headers) {
    // getTokenRedirect 함수로 가져온 accessToken
    String authorization = headers.getFirst("Authorization");

    // GraphServiceClient 생성
    GraphServiceClient<Request> client = GraphServiceClient.builder().authenticationProvider(new IAuthenticationProvider(){
        @NotNull
        @Override
        public CompletableFuture<String> getAuthorizationTokenAsync(@NotNull URL requestUrl) {
            // accessToken이 이곳에 들어간다.
            return CompletableFuture.completedFuture(authorization);
        }
    }).buildClient();

    // 사용자정보 조회
    User ssoUserInfo = client.me().buildRequest().get();
    logger.debug("ssoUserInfo : {}", ssoUserInfo);

    // 추가 이메일 정보를 가져오기 위해 otherMails를 호출
    User extraEmail = client.me().buildRequest().select("otherMails").get();
    if (CollectionUtils.isEmpty(extraEmail.otherMails)) {
        throw new RuntimeException("로그인 정보를 다시 확인하시기 바랍니다.");
    }

    // 추가 이메일로 DB 사용자정보 조회
    String userEmail = extraEmail.otherMails.get(0);
    Map<String, Object> userInfo = dao.selectOne("loginMapper.login", userEmail);
    if (ObjectUtils.isEmpty(userInfo)) {
        throw new RuntimeException("로그인 정보를 다시 확인하시기 바랍니다.");
    }

    return ApiDTO.ok(userInfo);
  }
번외
사용자정보 항목 추가
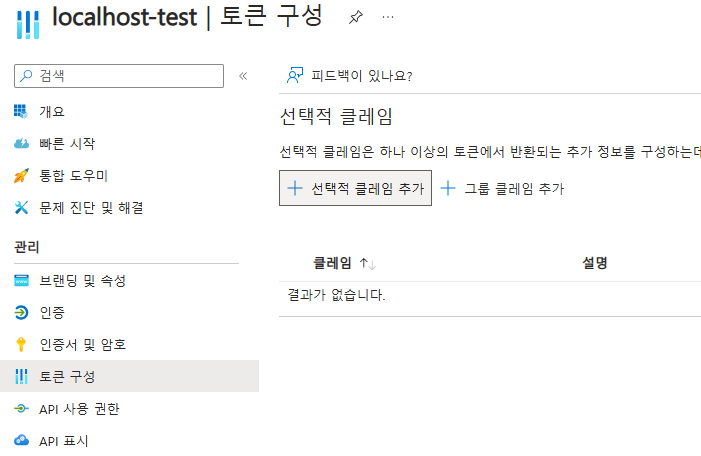
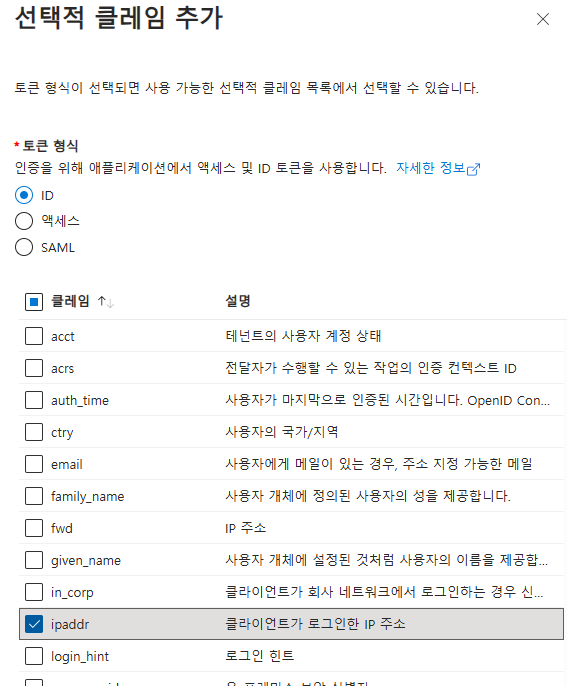
MS Entra에서 ID > 애플리케이션 > 앱 등록 > ${추가한 앱} > 토큰 구성으로 이동하여 등록 할 수 있다.
